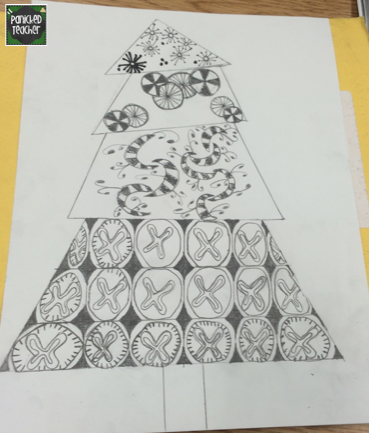
My students have been BEGGING me to try zentangle again since we made the zentangle pumpkins a few months ago. So, we took another crack at it! Since the holidays are fast approaching, we tried out this strategy with trees. The first thing we did was make a triangle on top, resting upon two trapezoids.
Zentangle Tree Pattern
Layer #1: Triangle
Layer #2: Trapezoid
Layer #3: Trapezoid
I have been researching different zentangle patterns and compiled different examples of designs to show my students. You can download this tool here. It really helped my students to expand their thinking and not just draw simple lines or circles.
Here are a few examples of the beginning stages of patterns and designs that the students chose to use. It is exciting to see students of all abilities get excited and invested into this project. Don't get me wrong though, this is definitely a 4-5 day process! Here is the timeline:
Day#1: 1st Draft-Draw the outline of the tree
Day #2: Begin inserting designs into different sections
(1 design per section!)
Day #3: Finish designs in 1st Draft as seen below
Day #4: Students apply sharpie to Positive Space (Usually the black shaded areas)
Day #5: Students use water colors to apply color. If students have watercolor pencils, this can help with shading and adding lightness and darkness which is great for color contrast. BUT, since I only had about 3 watercolor pencils (ugh!!!) simple watercolors work as well. They can always add shading when dry with chalk or oil pastels.
Here are a few examples of how the zentagle trees turned out. I LOVE how they look!
Other than creative
expression, zentangle benefits students by improving:
*eye/hand coordination
*problem solving
*confidence
*relaxation
*focus
Have you tried Zentangle in your class yet?


