Zentangle Pumpkins: A Terrific Art Strategy!

Thursday, October 23, 2014
I am trying to incorporate different art techniques into my lessons as much as possible this year because my students will only have a visual arts teacher for 9 weeks this school year.  The rest of the year it is pretty much up to me.  One art form I have been dying to try with the kids is Zentangle!  Have you heard of it? Prior to starting Zentangle with my students,  I did some research on this art form. Zentangle is a combination of drawing intricate lines, fancy doodling, and repetitive patterns  that really encourages creative expression!   Turns out zentangle will benefit the students in SO many ways.  Especially in:
*handwriting
*eye/hand coordination
*problem solving
*cross-cultural understanding 
*relaxation/focus
*confidence
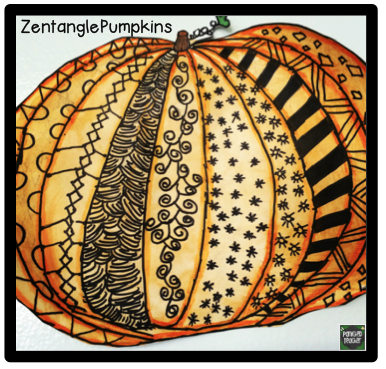
The fact that this art form would help the kids in all these areas (especially relaxation and focus) I was hooked! Since Halloween is around the corner, I decided to have the students make Fall Pumpkins with Zentangle. First, I had to gather up all the necessary materials. 
Materials Needed:
White Construction Paper
Black Sharpies
Orange Watercolor Paints
Orange Chalk
Orange Watercolor Pencils

Step #1) Rough Drafts
I had the students choose the direction of their paper.  They needed to draw a LONG oval in the middle of the paper and cresent moons on the sides to make their shape of the pumpkin.
Step #2) Add Repetitive Pattern Designs
Next, we talked about different patterns that that they could draw in each section.  I found this website that shows MANY examples of different patterns that the students could use.  Click here to be taken there.  Students got busy drawing their patterns and were loving it. Here is an example of a finished rough draft.
Step #3) Trace with Sharpie
Now it was time for the students to go over the lines with a black sharpie.  They also made sure to completely fill in the shaded areas with black.  
Step #4) Add Watercolor Pencil
Next, it was time to add water color pencil along the main lines of the pumpkin for shading/darkness.  
Step #5) Blend and Add Media for Color
Finally, the students used water and brushes to blend everything together.  Some students added watercolor paints for added color.  Others added orangish chalk to make them even more vibrant when the pumpkins were dry.  Here is how they turned out!  
Step #6) Display!
They are so much fun to have up in the room and added the PERFECT amount of color.
 Have you tried Zentangle (or are you wanting to try Zentangle) with your students?

HALLOWEEN

Friday, October 17, 2014
October brings so many opportunities for FUN!  I LOVE busting out the Halloween stuff for the kids, and the best part? 95% of the time, they are STILL learning! (5% MAY be due to eating candy… ;)) The first thing I like to do with my 5th Graders? Completing a CLOSE READ on Halloween.  To be honest, they are just excited that they are doing something Halloweenish AND this is MOSTLY a history lesson that integrates literacy strategies.  How can you go wrong?? 

I always say to my students, I know MOST of you LOVE Halloween, but do you know the HISTORY behind this special Holiday? 

Their interest is usually piqued at this point! I like to ask the students; Did you know that Halloween derived from an ancient festival, was a time to honor the dead, and was a time for warding off evil spirits? Next, we DELVE into this little passage seen below.  It is short and sweet, GREAT for Close Reading! If you would like to try out close reading with your students, click on the picture below to be taken to this passage!
Halloween Close Read, All About Halloween, Halloween Informational Passage
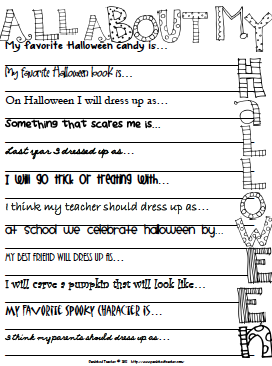
Below is a freebie for you to use around Halloween time. This is a little ALL ABOUT ME activity that I love to display on my door during the month of October!

All About Me Halloween Activities
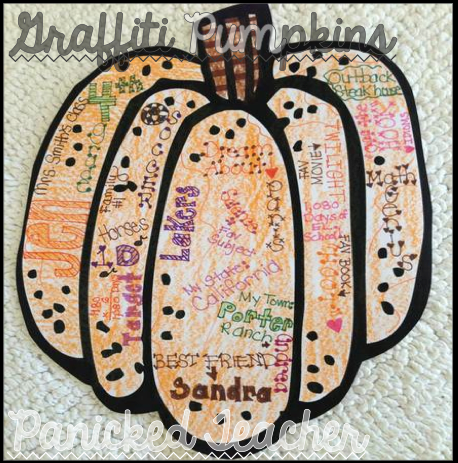
The next project I like to do with my students are GRAFFITI style pumpkins.  Pick up this <FREEBIE> in my TPT store complete with a LIST of questions that students can answer about themselves.  I think this makes a GREAT keepsake for the students! (Click on the PHOTO below to be taken to this project!)Graffiti Halloween Pumpkins
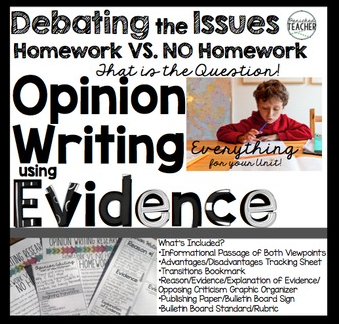
Finally, if you are in need of materials for HALLOWEEN OPINION WRITING, you have come to the right place! With this product that can be found HERE, students will write 3-5 paragraph essays (depending on your grade level) related to a Halloween topics.  Topics range from what is your FAVORITE part about Halloween to more rigorous/difficult topics such as should Trick or Treating be allowed

Do you need a fun way to introduce Opinion Writing to your students?  I like to have students cut and paste different Halloween pictures from magazines (or they can even draw them) and then write their individual opinions about what is going on in that picture.
Halloween Activity, Halloween Cut and Paste, Halloween Opinion Wrting

The paragraph scaffolds (seen below) 
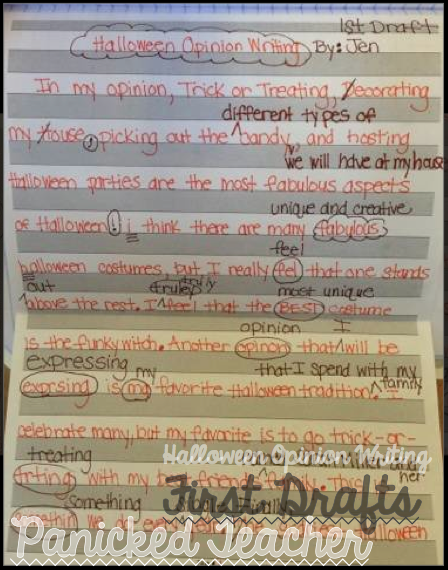
guide students through writing each paragraph.  Included below is my teacher model for the first draft (After editing and revising!)
Halloween Opinion Writing, First Drafts Opinion Writing, Halloween Writing Lesson
 Below is a copy of the CCSS aligned criteria chart and rubric that just happens to be Halloweenized with Pumpkins!  
The kids LOVE it!! 
Click on the link below to look at this product in further detail.  Happy Halloween! 
What special things do you do to get ready for Halloween?

Meeting Individual Needs: A Helpful Tool!

Wednesday, October 15, 2014

It can definitely be a challenge to truly know when students "don't get" a concept. Sometimes my students are reluctant to bring it to my attention when they are having difficulty understanding something!  I know that as a teacher, it is a challenge to have systems in place for pulling students aside that need individual help.  

Last year I developed a "HELP TICKET" that the kids could use to alert me when they need extra help.  Students fill out this form when they are confused on a topic and need some extra one-on-one time with me. I LOVE it!  It eliminates the students coming up to me and saying "I DON'T GET IT!"  and allows me to know exactly what students are having trouble in. 

This is how it works.  The students staple the help ticket to the assignment they are having difficulty with.  After filling out the help ticket and stapling their assignment, they place it in a designated basket which I check daily.  This way, myself or my T.A. can set aside a time during individual work time (even downtime/SSR) to meet with these students and work with them individually.  This is helping me feel more successful as a teacher since I am (HOPEFULLY) not letting kids slip through the cracks if they are having a hard time with something.  

It also gives the more reserved and shy kids a voice when they need help. Some kids are much more comfortable with writing down when they need help versus asking.  Here is what the "HELP TICKET" looks like, along with a few examples from some of my meetings with students.  I save the help tickets to show parents during conferences.  This is WONDERFUL documentation of how you are meeting student's needs.  The parents LOVE it too and some even take some home so that they can have them on hand. Click on the pics below to be taken to this download...
Do you have any tricks for meeting the needs of your students?

Close Reading!

Sunday, October 12, 2014
I have seen my students make a transformation from quiet and passive readers to rather spirited and keyed up readers! How? Close Reading!  I began investigating this hot topic last year after I felt like the students needed more comprehension practice.  I turned to close reading and thought that it could possibly be the answer to taking my student's reading comprehension to the next level!

Close reading gives the students an opportunity to dissect complex text. My goal as a 5th grade teacher is to have my students leave me able to read complex text at the higher end of their lexile level (see grade level lexile levels here) independently with fluency, prosody, and with understanding!  That is a bit of pressure (for ME and the students!) Here is a doc I made to show my parents the different lexile levels. (Information received from the Lexile Framework for Reading)

Close reading gives students the tools that they need to attack these complex texts ALONE so that if they were stranded on a desert island (just like when taking a test) they would have a toolkit of strategies at their fingertips to use in order to comprehend and respond to what they are reading.

 During a test, the teacher isn't there to front load information, give vocabulary help, or introduce any information SO students need practice with cold reads.  Here is a poster I have posted in my classroom so that students have a visual reminder of what close reading is.
The next poster outlines how I incorporate close reading into my classroom and what the students are doing after each read.
After the first read, the students use annotation marks to signify that they had a reaction to the text.  They use annotation marks to identify the main idea, supporting details, information they found surprising, information that raised a question in their mind, new vocabulary, information they agree and disagree with, and connections they see.  After the 2nd read, students EXPLAIN their annotation marks.  I have the students staple the following annotation charts to the passage they are reading so that they have a quick visual reference to use. Click on the picture below to be taken to the free download.
The following picture shows a sample of how I model Close Reading with the kids.  I use passages from my Close Reading Units that can be found by clicking on the links below.


How have you used close reading in your classroom? Please share in the comments below.

Teaching Decimals with MENUS!

Saturday, October 4, 2014

#1 Introduce the Concept
The first thing I do to introduce a concept in Math is to bring out their interactive notebooks/journals!  (This serves as a nice reference tool for when they need a model anytime throughout the year) Here is what we did for multiplying decimals.  First, we related multiplying decimals to fractions.  We looked at the similarities between having only 1/2 of a pie and half of a dollar or .5.  We drew a picture of what 3 halves of a pie looked like or .5 x 3.  This was a good visual for students needing to know that decimals can become whole numbers!  Next, the students glued in a multiplication template so that when they were multiplying, they could keep their columns and rows straight.  They recorded the steps to the side of the example.  The template for the math journal can be found here.  

#2 Real World Application
As my class continued to work on decimals, I thought it would be fun to bring in menus so that students could begin exploring real world applications.  I searched for menus online and found a perfect one from Boston Market! (Click on the picture below to download their menu)  Students paired up and pretended like they were going on a lunch date.  For the students that wanted to work alone, they chose a family member that they would pretend to be going to lunch with.  
After handing the students their menu (they were BEYOND excited that this was a real menu by the way!) students decided what they wanted for "lunch" and recorded their choices on the following template I gave them. After adding up how much their meals would cost, we talked about how there is STILL the tax and tip.  They were in disbelief that the bill would cost even more!  The bigger question? What is TAX??? We discussed how "tax dollars" were used to run our schools, repair our streets, and even pay the President of the United States!  Some even made the connection that when they have gone to other countries, the buildings and streets are not as "nice" and was it because they didn't have to pay taxes???? (A whole other lesson!!!!)  That brought us to tipping.  We just focused on finding 15% of the bill to go to the waiter/waitress that worked so hard to bring their table their food, etc... The kids couldn't wait to tell their parents about this one and to see how much their parents tipped the next time they went out to dinner.  Here is what my model looked like! 
Using MENUS to teach DECIMALS. Here they are ADDING DECIMALS, MULTIPLYING DECIMALS, and SUBTRACTING DECIMALS to find the total cost of everything, the TAX and TIP! Very good REAL WORLD skills and things to know for the kids.
To get the kids involved even more, the next thing they did was to design their own menus.  That way, they could practice these skills using menus that they created.  Here are a few pictures of their masterpieces! 

To download the template we used, click on the pic below.  
How do you teach adding, subtracting, and multiplying decimals in your class? 

Powered by Blogger.
Back to Top